
I recently learned a whole new approach to hemming pants that is easier than the other method I know and also provides much better results. This method for hemming pants is suitable for beginners and can be done by hand or with a sewing machine.
(Hemming pants is just a fancy way of saying “making pants shorter”.)
You can definitely hem a pair of pants with just a needle and thread, but a sewing machine definitely makes it a lot faster and easier. I’ve had my sewing machine for years, but if I was looking for a new one, I think I’d go for this model on Amazon (affiliate link).
Knowing how to hem pants is a great life skill to have. It can be a struggle to find pants that are exactly the right length. I used to not buy certain pants just because they were too long and I thought hemming them was too much of a hassle.
After learning this method of how to hem pants, jeans that are a tad too long will no longer be a problem!
I could hem a pair of pants before if I had to, but the results were less than ideal. Now, I can quickly and easily create professional results.
My previous method for hemming pants looked like this:
- measure how much extra length there was
- cut off about an inch less than the amount extra
- fold under twice and pin
- sew
The problem with this method is that the hem at the bottom doesn’t look the same as the original hem. My basic sewing skills don’t even let me make a good approximation to the original hem and matching the thread color is also an issue if, like me, you only have half a dozen colors of thread on hand.
The magic in the new method I’ve found is that you hem the pants without cutting the original hem. It’s a super slick trick that keeps the pants looking like they did originally.
My newly discovered method for hemming pants looks like this:
Time needed: 15 minutes
How to hem pants the easy way
- Measure how much too long the pants are
Try them on with the shoes you intend to wear them with. It can be nice to have a helper for this step.
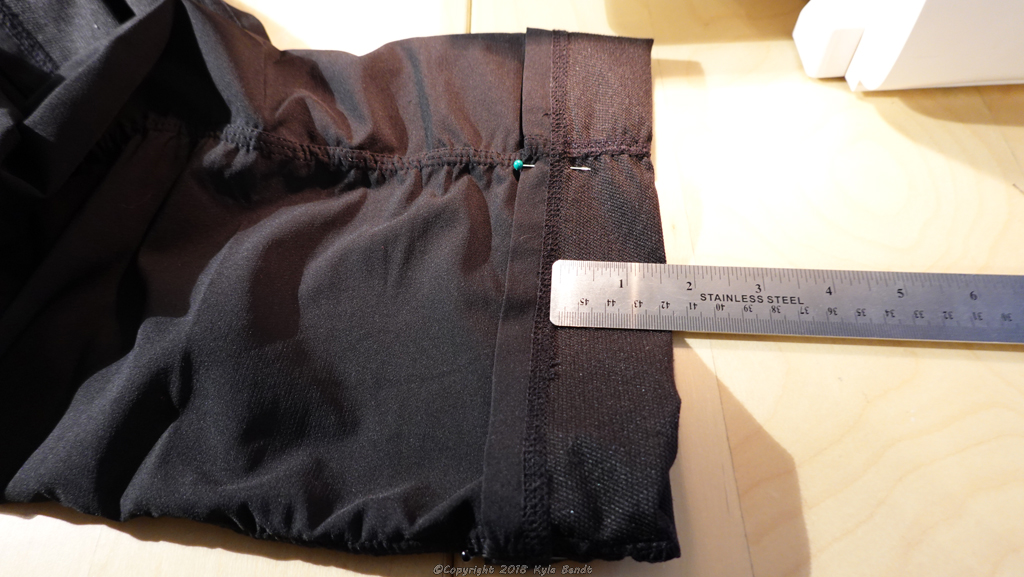
- Fold and pin the pant leg
Fold the pant leg up so that the distance between the bottom of the existing hem and the bottom fold is half the length found in step 1. Pin into place.
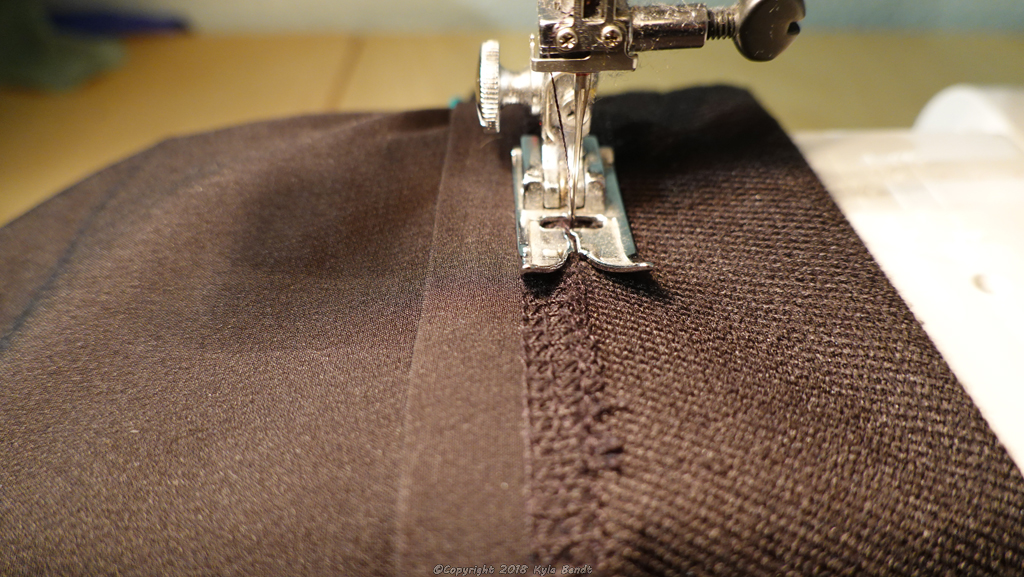
- Sew just below the existing hem
The thread won’t really show, but you still want to use a color that matches as closely as possible. You can either use a sewing machine or just do it by hand. Sew close to the existing hem, but be careful not to sew on top of it.
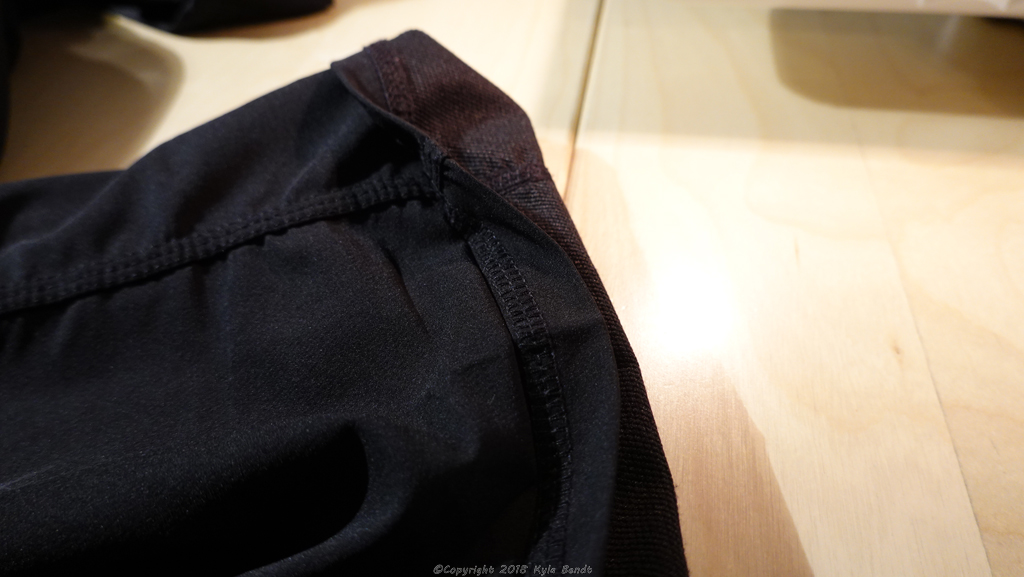
- Fold the original hem back down
This is the step with the magic! Now the original hem is still there making your hem job look super professional.
- Cut off the extra fabric (or just fold it in and secure with a few stitches)
Option A. Cut it off leaving about an extra 1/3 inch. Iron the seam so that the piece with the original hem isn’t tempted to fold back up. This is the best option for heavier fabrics like denim and fabrics that aren’t likely to fray too much.
Option B. Fold the extra fabric back up inside and add a few stitches to secure it. (This is a great option if you want a hem that can be let out later- say for a growing young person.) The stitches ensure that it won’t fold back down and show when you’re wearing the pants. I use about 5 stitches across the vertical seams lines where they won’t be noticeable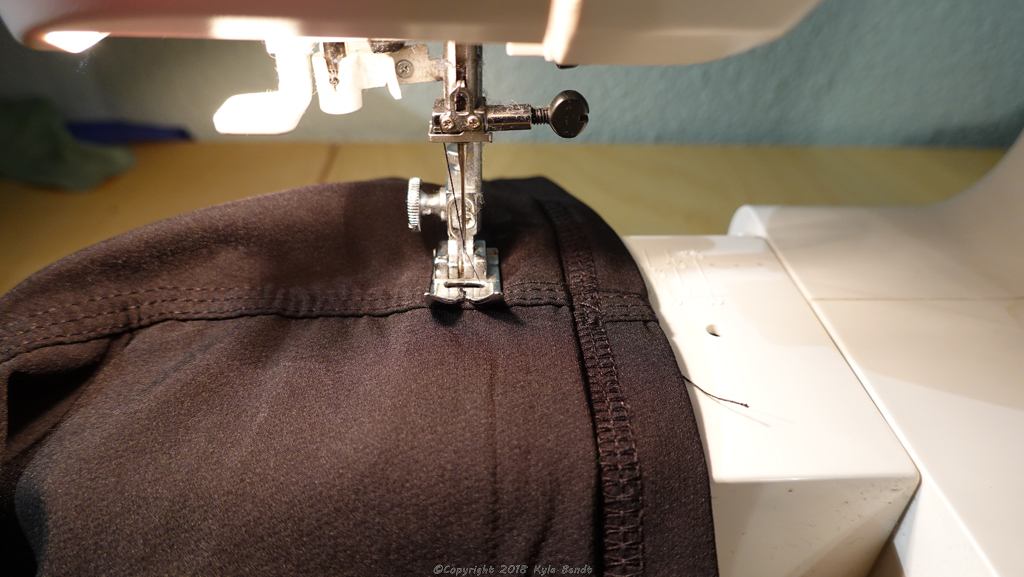
This is a super slick method to achieve a great end result. If you give it a go, let me know how it works for you in the comments below!
You might also enjoy reading how to make laminated picture magnets.
Credit where credit is due
I learned about this trick from How to Get Dressed: A Costume Designer’s Secrets for Making Your Clothes Look, Fit and Feel amazing (Amazon affiliate link). It only had a couple of sentences about this trick which was referred to as the ‘Hollywood Hem’, but I vaguely remembered it and came back to it when I was looking to hem some pants.
I actually only read part of this book, but the point that really stuck out to me was how it’s only relatively recently that we’ve started expecting mass-produced clothes to fit us right off the rack. It highly recommends getting a good tailor to make modifications. That made a lot of sense to me, but looking for a tailor is not on my to-do list for the day. I will definitely be making sure my pants are the right length though!
Why actors look like a million bucks
The author states that she has never put an actress or actor on stage without at least some sort of modification to each item of clothing to make it fit properly.
Apparently that is part of why they always look so good!
This is not the sort of book that I would normally pick up- I’m not that into clothes, but I think I’d read a review somewhere that peaked my interest. The part I read was pretty interesting and had lots of great tricks. I imagine there was more good stuff in there, I probably just got distracted since I tend to read many books at once. In any event, I am thankful to have picked up this trick from it.


21 Responses
I did this on a pair of jeans that were made of stretchy denim material. When sewing, I stretched it and the result was a ruffled look, in addition, although I serged the excess fabric, it raveled. The hem flipped up after washing and I had to iron the hem down every time. After wearing them several times, I just got fed up with the way they looked when wearing and will be cutting them up and using the fabric in other projects.
If you cut the excess with pinking shears, it won’t unravel.
I have recently found this trick with leaving original hem. It is so easy that you can barely believe that you did not come upon that sooner. I have started using my zipper foot and it gets real close to the original hem. I love the way it looks like it is suppose to. Since I’m short I have to hem most things I buy.
I just looked at your post & it was difficult to see what you did because the material was so dark! Maybe lighter material and then turn it after your finished so we can see how it turned out.
@hotmail.com
When you demonstrate a method it really helps if you use white fabric and black thread otherwise it’s impossible to see and understand what you are doing. I agree with those who mentioned “the bulk”. – not a good method.
I didn’t under stand what you did..
When you launder or iron the bottom, wouldn’t the extra fabric above the hem leave a bulge or mark?
Probably. Why not just cut off the extra & run a stitch over the existing hem stitch?
I have called this a “foe” hem for years, it keeps the original stitching pattern and threads, only draw backs are as you mentioned, bulk and iron marks on outsides. You must keep your new hem line as straight a possible to original or it will show. Next I trim the edge closest to the original hem with zigzag scissors to about 3/8″ then I serge the other to a length (on average a 1/2″) that allows me to stitch it just below or above the original hem line. This only works if there is enough room to get z scissors in, if not use straight scissors, just make sure the cuts are staggered to reduce bulk. This is the only way I have found yet to eliminate the bulk above original hem line as this method just makes a bit thicker hem line I hope this makes sense to you.
I still don’t understand how to do this method! I could use a video. Do you know anywhere I can find a tutorial or a video of this?
Here is a video that explains it nicely:
https://youtu.be/P02Mne95-s8?si=ydE2ciLbjUnvRtcf
Or lookup @professorpincushion on YouTube.
I want a video as well!! My daughters and I are short. I’m 40 and 5 foot. My 15 year old is 5’ as well and 9 year old is 4’5” so finding any pants that fit us perfectly is hard. Old Navy and Hollister is about the only places that carries pants fit us length wise well that we don’t have to hem. I used to know how to use a sewing machine in middle and high school (many many years ago) well, now I have a. Rams new Brotner LX2500. My aunt bought it brand new. It sat in her closet in the box and she never opened it so she gave it to me. I don’t know if this is a good one or not but it’s better than nothing so I’m going to give it a go! I just saw a comment with a link to a video so I’m going to try that and hope it helps!
I will definitely try it. Thank you.
Love it. Very clean and easy.
Can you send a hint how to hem t shirts please
Is this method for pants with a cuff?
A super idea!!! Thank you.
I love this method especially on jeans!! Because the original hem is still visible and as we all know you can pick out a altered jeans hem from a mile away and this method you can’t tell! 💙💙💙
Thank you! I will definitely try this.
Thank you. Will give it a try.
It’s called a French hem. If you want to cut the extra fabric off you can also serge the edge