
I recently took a class at Quelab on product photography. I’m going to share the general process and a few of the cool tips I picked up.
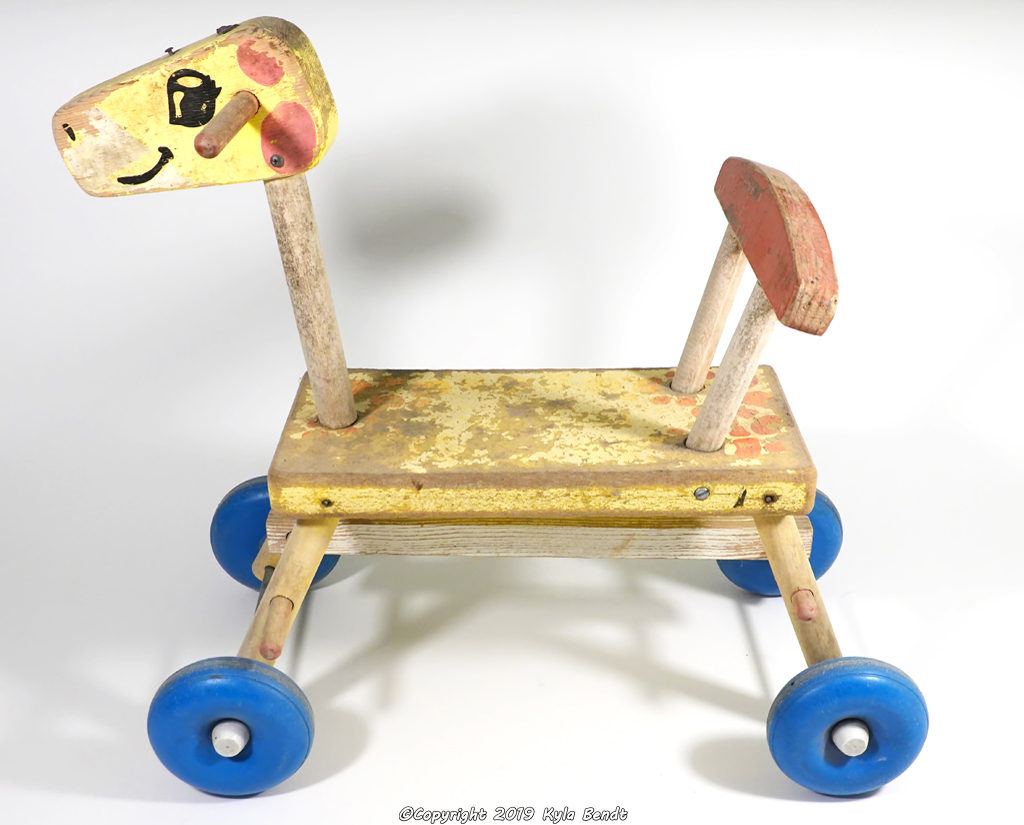
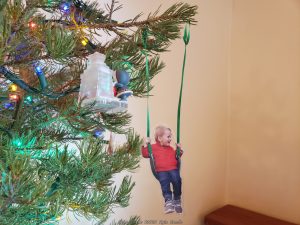
This is gong to be a beginner level overview of the process to give you an idea of how it works. If it’s something you’re looking to learn, it will be enough to give you some direction to start with. Or if you’re just curious how pictures like the one of this ride-on giraffe are taken, it will provide an overview of how the process works.
What is product photography and what else are these techniques good for?
The class I took focused on taking pictures of things to list for sale online. Some of the same techniques would be good for other things like documenting work on a project or taking artistic photos.
The basic goal here is to have the picture be just of the object, not of the weird miscellaneous stuff you may have in the background of your house. It is also to really give people a good idea of what the thing looks like.
And to make it look good so they’ll want to buy it!
Have you ever wondered how people get those pictures of things that just appear to be floating on white?
I have. And this class answered my questions about it. Most of the tricks are in the setup.
Setting up the studio
The setup for this does not have to be too complicated, but a few key items are necessary to create the wanted results. One could spend a small fortune on a setup, but it’s not necessary.
All that’s really needed is a good back drop and a few lights.
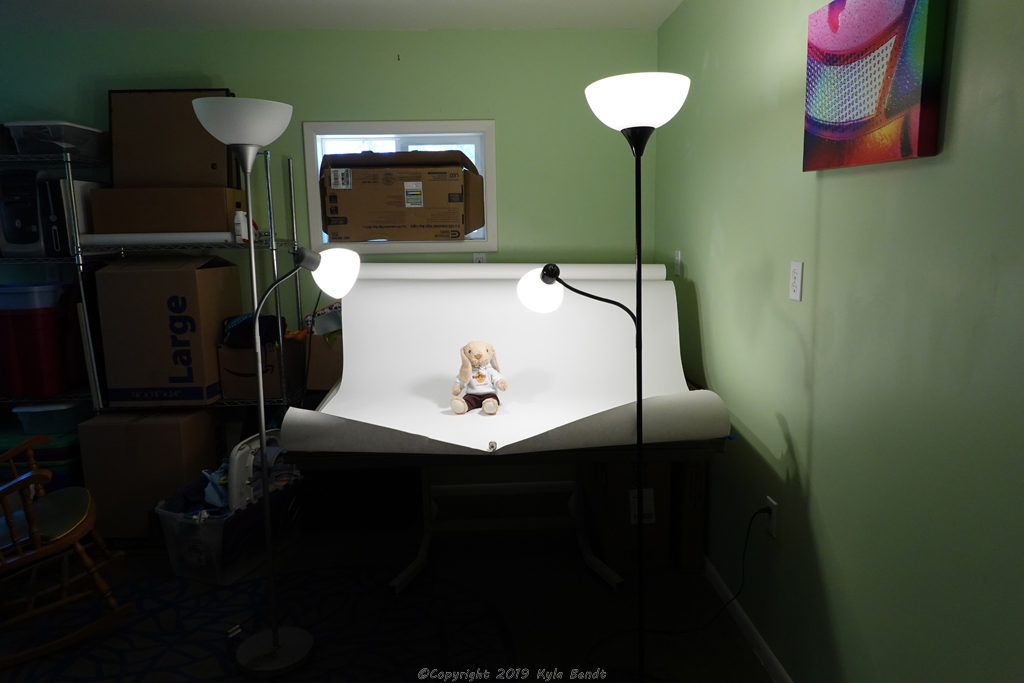
The backdrop
The first trick is a good backdrop. After taking the class, this was the one thing I felt like I couldn’t live without. They make all different types, but the one my class used was a roll of paper specially designed for photography.
It features low reflectivity and a very unnoticeable texture. I ordered a roll of Savage Seamless Background Paper to start playing around with.
One thing I’ve learned in life is to try to practice any new skills I learn as soon as possible if I hope to retain the information. I took the class on a Saturday and ordered my background paper the next day.
The nice thing about a paper background is that it comes on a long roll. If the part you use is still clean when you’re done, you just roll it back up. If you scoff it up or somehow mess it up, you just tear off the bad part.
The key with setting up the paper is to have it start higher than the object and then to make sure that there is a gentle curve between where the paper is vertical and where it’s horizontal. This makes the background totally continuous without any sudden changes in lighting or shadows.
Lights! Camera! Action!
Actually, this part is just about lights.
The class talked about a few different options including using real flashes that are meant for photography. Maybe I’ll get there some day, but I’m not looking to purchase a ton of gear at the moment.
I focused on the cheap and easy option of using a couple of lamps.
The tips I took away about lighting were to:
- Use at least two lamps
- Use the brightest bulbs possible
- Use the same bulbs in all lamps for consistent light color
- Make a shade for the lamps using wax paper to diffuse the light
For my current setup, I’m just using a couple of cheap lamps I already had around. I haven’t tried out the wax paper yet. It’s supposed to help diffuse the light to prevent hard shadows.
Camera setup
The biggest idea I learned as far as camera settings was to manually set the white-balance before starting.
I had seen the white-balance setting before, but I never really learned what it did until now. And it’s so cool!
This process tells the camera that the white background is supposed to look white. Then if the lights have a yellow tint (or blue or red or whatever color), the camera will adjust everything to compensate for it.
The exact way to access the white-balance on each camera is different, but once you find the setting all you do is point the camera at the white background and have it measure off of that.
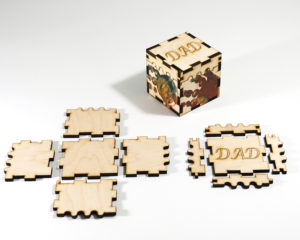
You can see that the backgrounds for the photos on this post are clean grey tones and don’t have a colored tint to them.
Now you’re ready for the Action! step. Oh. Wait. These are still photos, not video…

Editing
Once you have your photos, the last step is a little editing.
This could be done in Photoshop, Lightroom or another program. I won’t get into steps for how to do it on any specific program here, but you can always search online for how to edit the things mentioned here using your software of choice.
The four things we talked about editing were:
- White balance
- Contrast/tone
- Sharpness
- Cropping/straighten/rotate
The hope with the white balance is that setting the custom white balance on the camera does most of the work. Doing it with editing software is just to get any final tweaks.
My camera did a good enough job that I didn’t actually edit the white balance or sharpness of the photos here.
The tip I took about straightening/rotating is to aim to make the vertical lines of the subject vertical. Especially if one is looking at an object from a corner rather than straight on, the horizontal lines of the object may not appear horizontal in the photo and that’s ok.
Enjoy! Or get out there and sell!… Or whatever you want to do with your photos.
Yep, that’s it.
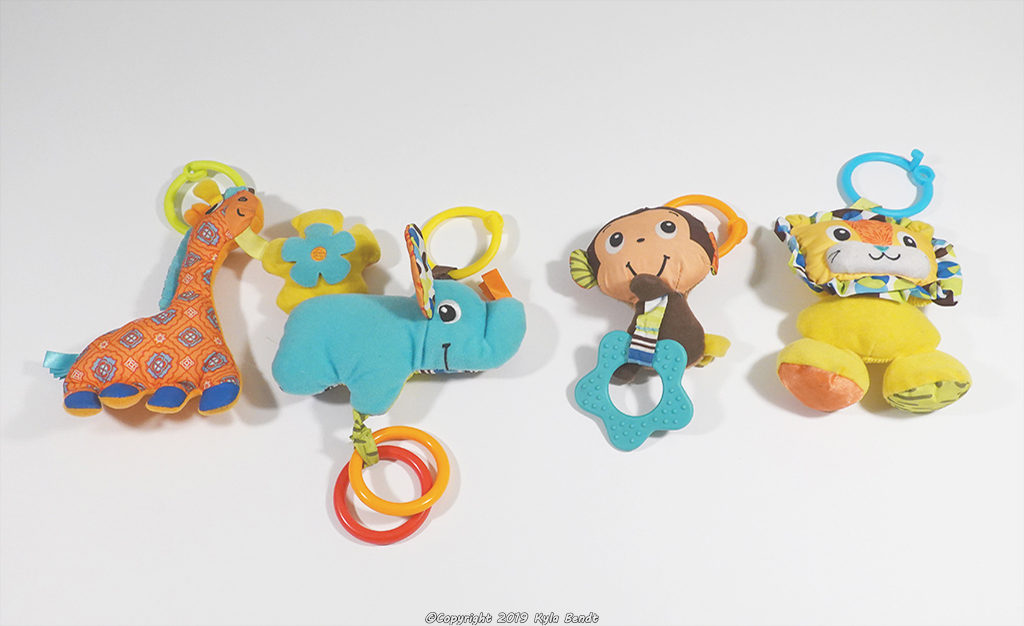
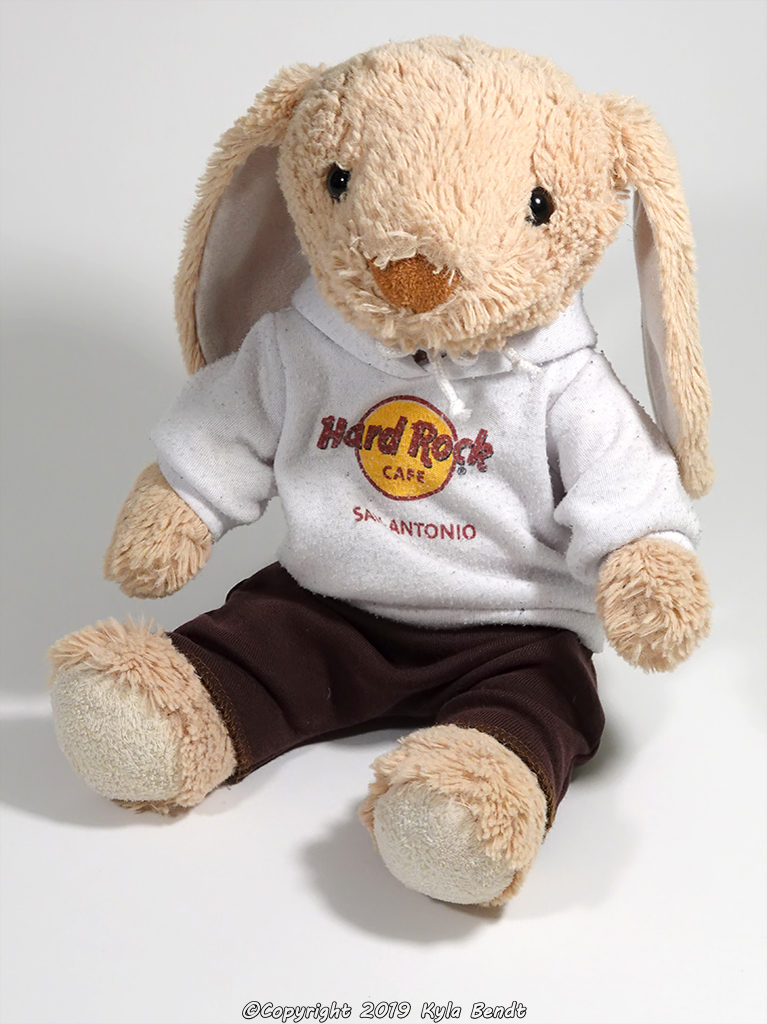
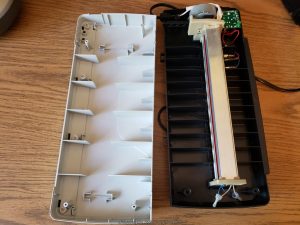
The photos on this post are the first ones I took using this setup. I just used a few items that were close to hand.
The whole thing went super quickly and I’m quite pleased with the results.
My photos do sort of have a double shadow thing going on which would probably be reduced if I used real flashes, was a bit more skilled with my editing or maybe if I’d rigged up some sort of wax paper shades over my lights.
But if I wanted to sell something on eBay, I feel like they would be more than good enough to show an accurate representation of a product and make it look good.
I’m happy with my photos for a first time with this sort of photography and a setup that cost less than $50.
Questions? Thoughts? Tips? Leave a comment!
Thanks to Ethan from cameradactyl.com and Quelab for the great class.
2 Responses
Very cool! Thank you for sharing. I’m obviously not going to create a photo set up in my van but if I ever need this info, I’ll know where to look. And I might give my friend the link, because she’s actually selling stuff on eBay right now.
I also heard at the class that Google prefers eBay listings that have the maximum number of pictures and that those listings are returned higher in Google search results.